The best power racks for home gyms are rarely the tallest, the shiniest or the one with the longest accessory list. They are the ones that stay put under a loaded bar, give you somewhere safe to fail, and fit the room you actually own. A rack is the one purchase in a home gym that can hurt you if it’s wrong. That’s why the best power racks deserve more scrutiny than the plates, the bench and the flooring combined.
This guide is the hub for our rack coverage. We start with whether you need a rack at all, then work through formats, steel, stability, hole spacing, safety systems, ceilings, attachments and cost. If you’re still deciding what to buy first, our guide to the best home gym equipment for strength training puts the rack in context with everything else.
Quick answer: the best power racks for home gyms at a glance
For most home lifters, the best power racks are four-post cages in 2×3 or 3×3 steel with 11-gauge walls, a wide footprint, numbered holes, solid safeties and a pull-up bar. If your ceiling is low or your floor space is tight, a half rack or a wall-mounted folding rack can still be safe. The safeties just have to be real, and the base can’t rock.
- Who it fits: anyone who squats or bench presses alone with a barbell, from a first-year lifter to someone with a decade of training behind them.
- The big tradeoff: mass buys stability and longevity, but it also buys a bigger delivery, a bigger footprint and a higher price. Spend on the frame and the safeties first. Spend on accessories later.
- Do before buying: measure ceiling height and doorways, confirm the hole size of any attachment you want, and search the CPSC exercise equipment recall page.
Read this first: how we researched the best power racks
How we researched this. This guide to the best power racks is research-based. It draws on manufacturer specification patterns, federal guidance and the ownership problems that buyers commonly report, such as wobble, hole misalignment and shipping damage. We have not hands-tested the rack types described here, and we name no brands or models on purpose.
Treat every number as a typical range and confirm it on the spec sheet of the exact rack you’re considering. Some links on this site may be affiliate links. If you buy through them we may earn a commission at no extra cost to you. Recommendations are based on the criteria in the article, not payout.
Last reviewed: October 2026. Specs, prices, shipping fees, warranty terms and recalls change often. Before you commit to any of the best power racks on a shortlist, check the seller’s current terms and search the CPSC exercise equipment recall list for the product name. If you’d like to know how we judge strength equipment in general, our page on how we evaluate strength equipment lays out what we do and what we don’t claim.
What is inside this guide
Do you need a power rack at all?
Let’s start with the awkward question, because a guide to the best power racks that assumes everyone needs one isn’t being straight with you. A rack is a big, heavy, expensive object. Plenty of people train well without one, and plenty of people buy one, load it twice and turn it into a coat hanger.
The honest case for a rack
The case is simple. If you squat or bench press with a barbell and train alone, a rack does three jobs. It holds the bar at the right height, it lets you unrack easily, and it gives you a way out if a rep goes wrong. Without one, you’re cleaning the bar to your shoulders just to squat. Or you’re asking a friend to hand you the bar. Or you’re lifting more cautiously than your legs deserve.
That last part matters more than it sounds. Lifters who can’t fail safely tend to stop two or three reps short, every set, forever. With the best power racks, working safeties let you push honestly because the consequence of a missed rep is a clang, not a trip to urgent care.
When something smaller does the job
If your plan is dumbbells, kettlebells and bodyweight work, a rack is optional. A pair of adjustable dumbbells and a bench cover a lot of ground, and our guide to the best adjustable dumbbells explains how to choose them. Likewise, if you only bench press once in a while, a bench with built-in uprights may be enough. It won’t give you the same safety net, though.
Federal guidance is worth keeping in mind here. The HHS Physical Activity Guidelines recommend muscle-strengthening activity that involves all major muscle groups on at least two days a week. A barbell is one way to meet that, not the only way. Buy a rack because you want to lift heavy things with a bar, not because you feel you ought to.
Signs a rack is the right next purchase
- You already own a barbell and plates, and you keep cleaning or deadlifting weight into position just to start a set.
- You train alone most of the time and you’ve ever skipped a lift because nobody could spot you.
- Your program leans on squats, presses, rack pulls or pull-ups that all want the same upright frame.
- You have at least a rough idea of where it will live, and you’ve measured that spot.
If three of those four sound like you, keep reading. If none do, our broader guide to home gym equipment at every budget may point you to a smarter first purchase.
Rack, Smith machine or functional trainer?
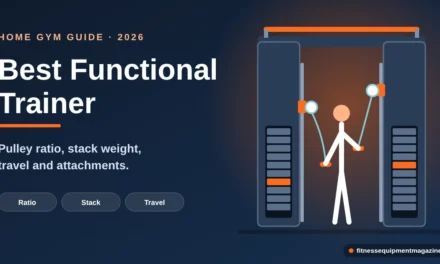
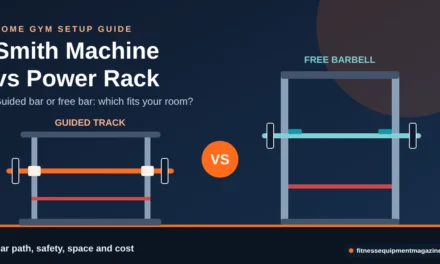
Racks aren’t the only way to lift safely alone. A Smith machine guides the bar on fixed rails and has built-in catches, which some lifters find reassuring and others find unnatural. A functional trainer swaps the barbell for cables and handles. Each has fans and critics, and each fits different rooms. If you’re comparing, our pages on the Smith machine versus the power rack and on the best functional trainers lay out the tradeoffs side by side.
Our take, held loosely: the best power racks offer the most flexibility per square foot for barbell lifters. The same frame handles squats, presses, pulls and a long list of accessories. Guided machines trade flexibility for a controlled path. Neither is wrong, but only one lets you grow into Olympic-style lifts later.
Six rack formats: where the best power racks begin
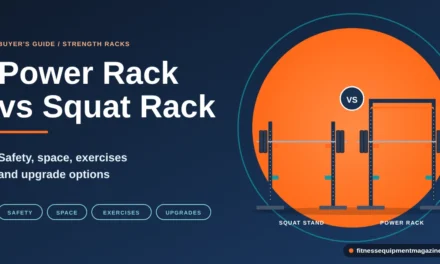
People use “power rack,” “squat rack,” “cage” and “half rack” as if they were interchangeable. They aren’t, and the difference decides almost everything else about safety, space and price. Our dedicated comparison of power rack vs squat rack goes deeper, so here is the quick map.
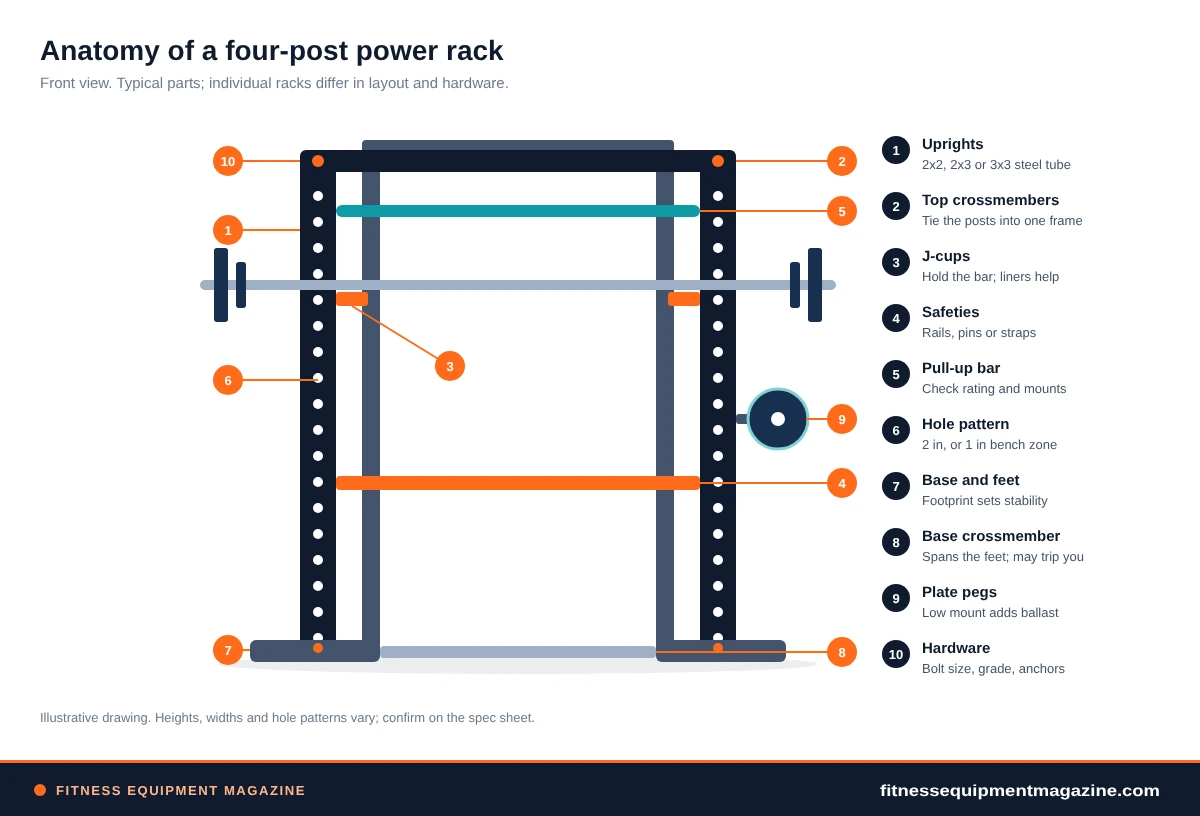
Keep that diagram handy. Every spec we discuss later points back to one of those numbered parts, from the uprights to the base feet.
Squat stands
Two freestanding uprights with J-cups. They’re cheap, light and easy to store, which makes them tempting for apartments. The catch is that they usually rely on pin-and-pipe or strap safeties placed in front of you, and many sets have none at all. A set with proper adjustable safeties can work. Without them, you’re back to hoping the bar behaves.
Half racks
A half rack has two or four posts and an open back, often with a rear base that sticks out for stability. It’s a good middle path. You get safeties and a pull-up bar in less room, and you can walk the bar out without threading it through a cage. Their weakness is rigidity: fewer crossmembers means more flex, so steel size and base width matter more.
Full power cages, where most of the best power racks sit
Four posts, crossmembers front and back, and safeties that span the whole interior. This is the format most people mean by the best power racks. You can lift inside it, rack the bar from any side and bolt on a stack of attachments. It needs the most room and the highest ceiling, which we’ll cover in the room section below.
Wall-mounted and folding racks
These bolt to wall studs or concrete and fold flat when you’re done. For a garage shared with a car, or a bedroom that doubles as a gym, they can be the only format that works. They also need a real wall: studs at the right spacing, ideally a masonry or well-blocked wall, and installation done exactly as the manual says. A folding rack is only as strong as the screws holding it up.
Combination racks with cable towers and guided bars
Some racks add a lat pulldown and low-row tower, or fixed rails that guide the bar. They look like a full gym in one footprint, and sometimes they are. But they get long, tall and expensive, and the attachments are only as good as the pulley quality and smoothness. If cables matter most to you, read our notes on functional trainers before you commit. If a guided bar is the draw, our Smith machine vs power rack comparison covers the tradeoffs.
Steel, gauge and welds: what makes the best power racks solid
Strip away the colors and the marketing names and a rack is steel tube, holes and fasteners. Three numbers describe most of its character: the outside size of the uprights, the thickness of the tube wall, and how the pieces join. Get comfortable with those and a listing starts to read like plain English.
Upright size in the best power racks: 2×2, 2×3 and 3×3
Uprights are described by their cross-section in inches. A 2×2 is a two-inch square tube, a 2×3 is two inches by three, and a 3×3 is the heavyweight of the home market. Bigger tube resists bending and twisting better, and it gives manufacturers more room to drill holes without weakening the post. That’s why the best power racks in 3×3 tend to feel dead solid when you rack a heavy bar and 2×2 racks tend to hum.
That doesn’t make 2×2 a bad choice, and a few of the best power racks for small rooms use it. Picture a lifter who squats a couple of hundred pounds and wants a rack for a spare bedroom. A well-built 2×2 half rack is perfectly reasonable there. The point is to match tube size to the loads you expect in five years, not the loads you handle today.
Gauge: the number that works backwards
Wall thickness is quoted in gauge, and the scale runs the wrong way: a smaller number means thicker steel. Roughly speaking, 14-gauge walls are about 0.075 inch, 12-gauge about 0.105, 11-gauge about 0.12, and 7-gauge about 0.18. Those are approximations, and charts differ slightly, so treat them as a guide.
For a typical home rack, 11-gauge 3×3 is the combination you’ll see on most of the best power racks. Thinner walls can still be safe at modest loads. But they flex and dent more easily, and the holes can deform if a heavy bar lands on a J-cup too hard. If a listing says “heavy duty” and never states the gauge, ask.
Welds, bolts and finish
Most home racks ship as flat-pack parts that bolt together. Fasteners are usually half-inch class hardware, though thicker steel and bigger bolts show up on heavier designs. What you want is hardware that doesn’t strip when you torque it, washers that spread the clamp load, and tubes that line up without persuasion. Misaligned holes are one of the most commonly reported assembly gripes, and they hint at loose tolerances in manufacturing.
Welded racks, especially base and crossmember assemblies that arrive as one piece, can be stiffer and quicker to build. They’re also harder to ship and carry. As for finish, powder coating resists chips better than paint, but both scratch where a barbell sleeve scrapes the uprights. Cosmetic wear isn’t structural, so don’t pay a premium for a glossy finish unless the look matters to you.
Shipping weight is a decent proxy for steel. Say two racks claim similar sizes, but one ships at 150 pounds and the other at 350. The lighter one has thinner walls, smaller tube or fewer crossmembers. It’s a rough check, not a rule, but it catches a lot of vague claims.
Stability, footprint and weight ratings
A rack that wobbles teaches you to distrust it, and a lifter who distrusts the rack lifts worse. Stability comes from three places: geometry, mass and attachment to the floor, and the best power racks lean on all three. The cheapest racks skimp on all three, and the best power racks do well on at least two.
Why racks wobble
When you unrack a bar, walk it out and re-rack it, you push and pull on the uprights in all directions. A tall post with a narrow base acts like a lever. The taller the rack and the narrower its feet, the more a small sideways push becomes a rocking motion. Add a loaded bar slamming onto J-cups and you can see why base design matters as much as steel thickness.
Footprint and base design
Look at where the feet land. A four-post cage with a flat base gives you a wide rectangle of support. A half rack with a rear stabilizer foot gains depth. Two freestanding stands on small plates give you the least. Generally, the more floor the rack touches, the harder it is to move, and the less it rocks.
Plate storage pegs placed low on the uprights, or on a rear base, turn your plates into ballast. It’s a clever side effect: the very weight you own becomes stability. Pegs mounted high do the opposite. They raise the center of mass, which is why you want to read where an accessory attaches before assuming it helps.
Anchoring: bolt it down or weigh it down
Many manufacturers drill the feet so you can bolt the rack to a concrete slab or a platform. Do it if you can. A bolted-down rack won’t walk across the floor when you kip a pull-up or slam a bar into the J-cups. If you rent, or if your floor is wood, you can still add stability with a plywood platform, extra plates on pegs, or both. Our guide to home gym flooring covers platforms and subfloor protection in detail.
Never drill into a slab without checking for post-tension cables, radiant heat lines and rebar spacing. If you’re not sure, ask a qualified contractor. Use anchors recommended in the rack manual, and follow the rack maker’s instructions for hole depth and torque.
What weight ratings really tell you
Listings love big numbers: “1,000 lb capacity,” “1,500 lb rated.” Ask what is being rated. A rack can carry different limits for J-cups, safeties, the pull-up bar, the uprights as a frame and any attachments. The lowest of those is the one that matters in an emergency. Commonly, J-cups and safeties for home racks are rated in the range of several hundred pounds up to 1,000 or more, but verify each one.
Also keep in mind that a static rating isn’t a dynamic one. A bar dropped from a lockout lands with more force than the same weight resting quietly. That’s why the safeties’ own rating and the way they’re built deserve attention, a topic we’ll tackle shortly. Our power rack safety guide adds more on clearances and setup.
A 60-second wobble test
- Empty the rackTake every plate and accessory off, then stand at the front and push the top crossmember hard from side to side.
- Add a barSet an empty barbell on the J-cups, then bump it with your hip, as you would while stepping back from a squat.
- Load and rackAdd a moderate load, unrack, step back and re-rack twice, listening for creaks and watching for the base lifting.
- Check againAfter three sessions, retighten every bolt. Racks settle, and most wobble complaints disappear after a good retorque.
Hole spacing, numbering and the Westside question
Holes look boring until the day your bar is an inch too high to unrack comfortably and an inch too low to lock out. At that moment hole spacing becomes the most interesting feature of the rack. It decides how finely you can set J-cups, safeties and attachments, and it’s one of the details that separates the best power racks from merely adequate ones.
2-inch holes versus Westside spacing
Most racks drill holes every two inches along the uprights. That’s fine for squats, where an inch rarely matters. It’s less fine for the bench press, where the difference between a comfortable unrack and a shoulder-straining reach can be exactly one inch. Westside spacing keeps two-inch holes for most of the post and packs them at one-inch intervals through the bench zone, so you can dial in height without drilling every hole closer together and weakening the whole upright.
If you press often, Westside spacing is worth looking for among the best power racks. If you mostly squat and pull, don’t pay extra for it. Several designs also offer numbered holes, which brings us to the next detail.
Numbers, lasers and the crooked-bar problem
Racks with laser-cut or stamped numbers beside the holes save you from counting. They also protect you from a quiet hazard: setting the left J-cup one hole higher than the right. A tilted bar can roll, and a lifter unracking in a hurry might not notice until the weight shifts. Numbers make a quick visual check possible. Cheap racks often skip them, and the fix is a paint pen and ten minutes.
Hole size matters more than most buyers of the best power racks expect
Hole diameters of 5/8 inch and 1 inch are both common, and they aren’t interchangeable. Pins, J-cups, dip bars, band pegs and landmine mounts are built for one or the other. Before you fall for a rack’s accessory catalog, check that the holes accept hardware from the brand you plan to use. We’ll return to this in the attachments section, because it’s the quiet reason people end up stuck with one maker.
Setting your heights: a worked example
- Squat heightWith the bar empty, stand under it in your lifting shoes. Set the J-cups so the bar sits roughly at mid-chest, high enough that you stand up from a slight dip, low enough that you don’t have to tiptoe.
- Bench heightLie on the bench in your usual position and reach up. Set the J-cups so the bar is just a few inches above your straightened arms, so you unrack without your shoulders leaving the pad.
- Mark bothWrite the hole numbers on a card taped to the rack. A cheap habit, but it removes guesswork and keeps both sides level.
- Recheck after footwear changesHeavier shoes or a thicker mat change your squat height by a few tenths of an inch. Test with the empty bar first.
Safety systems: the part you never economize on
This is where the rack justifies its existence. Safeties are the pieces that catch a failed lift. A rack with excellent steel and flimsy safeties is like a car with great paint and no brakes. The best power racks make the safety hardware as sturdy as the frame.
Safeties on the best power racks: pin-and-pipe, strap and flip-down arms
Three designs dominate home racks. Pin-and-pipe safeties are steel pins through the uprights with a pipe sleeve you can set across the interior. Strap safeties hang heavy webbing between two uprights, giving a bit of give so the bar lands softly. Flip-down spotter arms mount on the front uprights and fold out to catch the bar.
Strengths
- Pin-and-pipe: very stiff, familiar and easy to adjust
- Strap: gentler on the bar and often quieter
- Spotter arms: quick to set and good for bench work
Tradeoffs
- Pin-and-pipe: loud when a bar lands, can dent knurling over time
- Strap: webbing wears and needs inspection
- Spotter arms: rating and length vary widely
There’s no universal winner. The right answer depends on a few things. Do you drop bars on purpose, as with bumper plates and Olympic lifts? How often do you bench alone? And will you really inspect the webbing? For a full discussion of clearances and setup, our guide to power rack safety goes deeper.
Where to set them
Safeties work only if they’re in the right place. A good rule on the best power racks is “just below the lowest bar position” for squats, and “just above your chest at the bottom” for the bench press. In practice, you’ll adjust a hole or two based on your build and the rack.
Setting and testing safeties
- Set the railsFor squats, set them one or two holes below the lowest point of the bar. For bench presses, set them just above your chest at the bottom of the rep.
- Check both sidesLook at the hole numbers, or use a tape measure, so the left and right rails match.
- Do a dry runWith an empty bar, squat or lower to your chest and let the bar settle onto the rails. Confirm you can step out or slide out.
- Add weight graduallyNever skip the first warm-up bar. Your body adjusts to the setup quickly, and the second set tends to be the one that exposes a wrong hole.
Strap safeties and pin-and-pipe safeties are rated for catching a bar, not necessarily for repeated drops from height. If you drop bumper plates deliberately, read the manufacturer’s rating first, and consider a platform or dedicated drop area instead of the safeties.
Other safety details worth checking
- J-cups with a protective liner, so steel doesn’t chew on the knurling every rep.
- Enough interior width for your bench and bar to clear the uprights.
- Collars on every set, even light ones. Plates slide, and a lopsided bar is a bad surprise.
- A recall check: search the CPSC exercise equipment recalls for the rack, the attachment and the bar.
- A firm rule for kids and pets: nobody enters the cage while a bar is loaded, and nobody climbs on it.
What hardware can’t do: spotters, judgment and bailing out
Safeties catch a bar, not a bad decision. They won’t save you from a loose collar or an uneven load. They won’t stop a bar that rolls off a bench, either. Even the best power racks need judgment: pick weights you can bail from, practice the bail with light loads, and know your exit before you need it.
That said, a human spotter and a rack aren’t rivals. If someone is nearby and willing, a spotter adds a second set of hands on the bench press and an extra set of eyes on form. Treat the rack as the backup you hope never to use, and your spotter as an extra layer, not a replacement.
What you actually do inside a rack: eight lifts and what each asks of it
Specs make more sense once you map them to movements. Each lift leans on a different part of the rack, and knowing which parts matter to you tells you where your money belongs. If you press, hole spacing climbs the list. If you squat alone, safeties come first. If you pull a lot, the base and pull-up bar take over.
Back squat and front squat
Squats are the reason most people buy a rack, and they lean hardest on safeties and stability. You unrack, walk back a step or two and descend with the bar on your shoulders. The rack has to stay quiet while you do that, and it has to catch the bar if you can’t stand up. Front squats add one wrinkle. The bar rests on the front of the shoulders, so you want J-cups set a touch lower to avoid a toe-tapping unrack.
For both lifts, watch the interior depth, because a cramped cage makes walking out awkward.
Bench press and pin press
Bench pressing asks for fine height control, a stable bench inside the cage and safeties or spotter arms at chest height. This is where Westside spacing and numbered holes earn their keep. Pin presses start the bar on safeties set partway up the range. They ask the safeties to be both sturdy and finely adjustable. A bench that wobbles inside a rack that doesn’t is still a wobble, so the pair has to work together.
Overhead press
The press needs two things from the rack. J-cups must sit low enough that you don’t tiptoe, and the bar must clear the top crossmembers. In a short cage, the bar can bang the top bar on lockout. That’s why low-ceiling lifters sometimes press from outside the rack. Standing on a platform adds an inch or two to your height and removes that room.
Rack pulls and block pulls
Rack pulls start the bar from the safeties, usually around the knee, and let you handle heavier loads than a floor deadlift. They test the safeties hard, because the bar sits on them rather than just landing on them occasionally. If you plan to do this often, check the safeties’ capacity and whether the pins or straps can handle repeated loading. Heavier gauge and 3×3 uprights make the rack feel better here.
Pull-ups and chin-ups
These lean on the pull-up bar, its attachment points and the rack’s base stability. A rack that sways under a pull-up is annoying and a little worrying. Look for a bar welded or bolted at several points and a base that stays planted. The position should let you hang without hitting the ceiling.
Dips, rows and landmine work
Dip bars ask for a rock-solid clamp on the uprights and enough width between them. Inverted rows, where you hang from a bar set in the J-cups, ask for a secure bar position and J-cups that won’t pop. Landmine work puts rotational forces on the base mount, so hole size and the sleeve’s fit matter. These are bonuses rather than reasons to buy, but they explain why accessory compatibility shows up in the buying criteria.
How much each lift leans on the rack (illustrative)
Rough guide only, since your technique and loads matter more than the lift’s name. The bars show how heavily each movement tends to lean on the rack’s safeties and stability. The scale is simple and invented for comparison.
The pattern is easy to read. If most of your training sits in the top three bars, spend on safeties and steel. If it sits in the bottom three, a lighter rack with a good pull-up bar may be perfectly happy.
Ceiling, floor and footprint: will it fit?
You can fall in love with a rack on a product page and still lose to a low ceiling, a narrow hallway or a basement stair. Fit problems are the most common reason shoppers send even the best power racks back. A tape measure and ten quiet minutes prevent almost all of them.
Ceiling height, with real numbers
Rack heights commonly run from about 70 inches for short or “low-ceiling” models to around 90 inches for tall cages. The ceiling you need is not the rack height, though. It’s the height of what you do inside and above it. A standing overhead press puts the bar well above your head, and a pull-up puts your head above the bar. For a lifter around six feet tall, locking out an overhead press often puts the bar near 7 to 7.5 feet. Shoes and arm length shift that number.
Our dedicated page on how much ceiling height you need for a rack, pull-ups and overhead pressing walks through the numbers for different statures. Here is the short version.
- Around 7 feet: look for a short rack, skip the overhead press inside the rack, or press from the safeties with the bar lower.
- Around 8 feet: a standard-height rack fits, but a tall cage with a pull-up bar might leave your head cramped. Measure twice.
- Nine feet and up: almost any rack fits, and you can add a taller pull-up setup.
Footprint, bar length and clearance
A rack’s footprint is only the start. The bar is about seven feet long, with plates on both ends, and you need to load and unload it. Count a couple of feet of clear space on each side for plate loading, plus room behind and in front for walking the bar out.
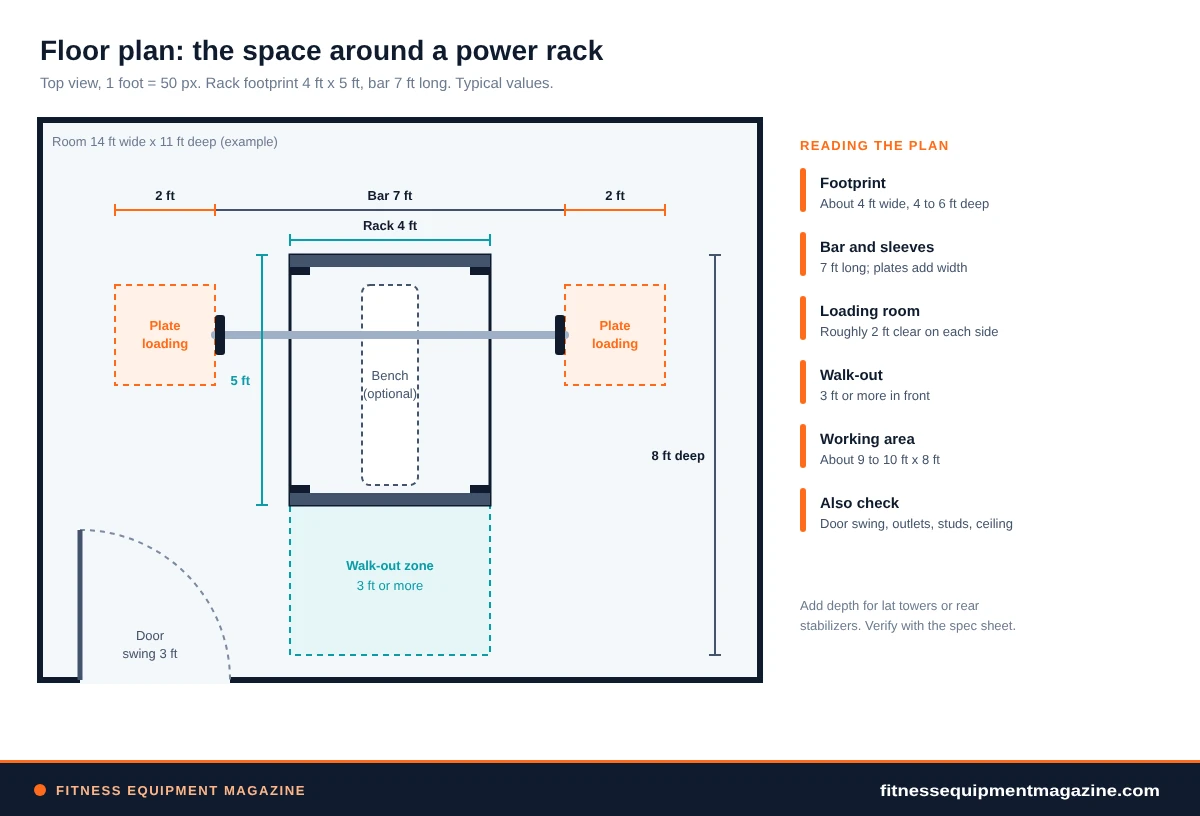
For practical planning, a typical four-post cage often takes roughly four feet by four to six feet before plate pegs. With the bar and loading room, the working area becomes something closer to nine or ten feet wide and eight feet deep. Racks with lat towers or rear stabilizers add depth. Our home gym layout guide and its companion on how much space a home gym needs include example layouts by room size.
Doorways, stairs and the delivery path
Even the best power racks ship in long, heavy boxes. Uprights can be seven to eight feet long, and a freight delivery often ends at the curb or the garage door. Walk the path from the truck to the room. Measure doorway widths, turns, stair width and any overhead obstacle such as a pipe or a low beam. A 30-inch interior door is common and a 36-inch exterior door is standard, but older homes vary. If you need to hire help, ask about it before you buy, not after.
What’s underneath: slab, wood or an upper floor
A concrete garage or basement slab is the easy case. Wood floors and upper-level rooms need more thought, because a rack plus a loaded bar plus a lifter adds up. A few hundred pounds of steel, hundreds more of plates and the lifter’s own weight concentrate on a small footprint. Our home gym floor load basics explains how to think about it. Dropped weights are noisy and can crack tile, so also read our notes on reducing home gym noise before you place the rack over a bedroom.
Specific rooms bring their own rules. A garage needs temperature and humidity thinking, which we cover in the garage gym guide. A basement has moisture issues in our basement home gym guide. And if you rent an apartment, start with the apartment home gym guide.
Pull-up bars, dip stations and built-in features
Most of the best power racks ship with some extras: a pull-up bar, J-cups, maybe a set of band pegs. They’re easy to ignore when you’re comparing steel, but they affect how often you use the rack. Here is what to look at.
Pull-up bars on the best power racks
A basic straight bar is fine for most lifters. A multi-grip bar adds neutral and wide handles, which many people find friendlier on the wrists and shoulders. Check where it sits. A bar at the front crossmember puts your body outside the cage, which gives you room. A bar at the rear lets you hang inside, which takes space. Bars that rise high on the uprights need ceiling clearance, so check it against the room before you buy.
Also check the pull-up bar’s rating and attachment method. Cheap bars sometimes bolt on with two small screws. Kipping or swinging adds load, and a bar that creaks under a slow pull-up will not enjoy a swing.
J-cups: the small part that touches the bar
The J-cup is the hook that holds the bar. Good ones have a liner, usually a plastic or UHMW insert, that protects the knurling and quiets the landing. Others are bare steel, which can scrape the bar and make a sharp clang. Some designs use sandwich-style cups that clamp the bar from above, which add a bit of safety on the bench press. Look for a wide mouth, a deep lip and a hole fit with no sloppy play.
Plate pegs, bar holders and storage
Many racks include pegs for plates and a spot to park a barbell. They’re handy for tidiness and, as we saw earlier, for ballast when placed low. If storage is your main pain point, a separate plate tree may beat pegs. Our guide to home gym weight storage compares plate trees, dumbbell racks and wall systems.
The base and crossmembers
Finally, glance at the base. A rack with a front crossmember on the floor can trip you when you walk out. Others leave the floor clear so you can step in and out freely. There’s no right answer, but know which one you’re buying. If you plan to use a platform or lift on a plywood base, check that the feet and crossmembers fit on it without gaps.
Rack and bench: width, length and the exit path
The bench and the rack have to get along. Interior width matters first. A bench twelve inches wide at the pad slides into almost any cage, but wide-footed benches can catch on base crossmembers. Next comes length. With the bench placed so the bar sits over your eyes, your head and feet should both fit inside the working area without banging a post. Finally, think about the exit path. When a rep fails, you want to slide out toward the head or to the side, not into a wall.
Many of the best power racks pair neatly with a flat-folding bench for tight rooms and a sturdy adjustable one for everything else. If you’re torn on that choice, our comparison of a flat bench vs adjustable bench explains which to buy first. Test fit before you finalize: set the bench in the rack, lie down, and look at the J-cups from your pressing position. If you can’t see the bar path clearly, adjust.
Attachments and the ecosystem problem
A rack is a platform. Over a couple of years, the best power racks tend to collect things: dip bars, a landmine, band pegs, a lat tower, a set of spotter arms. Whether those parts fit, and whether anyone still sells them in three years, is the “ecosystem” question. It’s easy to ignore until you need a part.
Hole size, tube size and brand lock-in
Add-ons are built for a specific hole diameter and often a specific upright width. A dip bar made for 3×3 posts won’t clamp onto a 2×3. Some makers share patterns, so parts cross over between brands. Others keep their own dimensions, which means you buy their accessories forever or fabricate adapters. Before you commit, find two or three accessories you’d like and confirm they fit the rack you’re considering. If a seller can’t tell you the hole size, that tells you something.
The add-ons worth buying first for the best power racks
- SafetiesIf they weren’t included, they’re the first thing to add. Skip nothing here.
- Dip barsOne of the best value-per-dollar attachments, and a good test of whether your frame feels solid.
- Band pegsCheap, simple and useful for warm-ups, assistance and accommodating resistance.
- LandmineGives you rows, presses and rotations with a single barbell. Our landmine attachment guide explains floor units, rack mounts and compatibility.
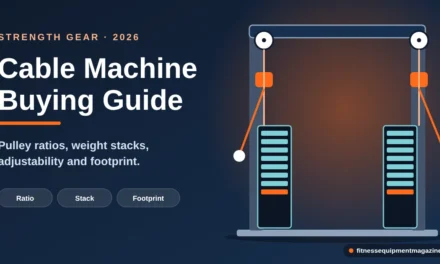
- Lat and low-row towerWorth adding once you know you want back work in the same space. Cables take more room and extra maintenance, as we explain in the cable machine buying guide.
If you end up wanting handles, ropes and cuffs for the cable add-on, our page on cable attachments explains what each one changes.
What else has to work with the rack
The rack doesn’t live alone. A barbell has to fit between the uprights. A trap bar needs room to be loaded and stored, as discussed in our trap bar guide. Benches need to slide in and out, which is why a well-built adjustable weight bench and a rack with a compatible interior width belong in the same shopping plan. And the barbell itself deserves a decision: our barbell buying guide and the comparison of Olympic vs standard barbells make sure you’re not buying a rack that can’t take your bar.
The real cost of the best power racks
People price the rack, feel good about the number, and then discover the other half of the bill. Plates, a bar, a bench, floor protection, delivery and fasteners often cost as much as the frame. It’s the same trap that applies to every home gym purchase, which is why our home gym budget order for $500, $1,000, $2,500 and $5,000 starts from the whole system rather than the headline price.
Typical price classes for the best power racks
These are rough classes, not quotes. Prices swing with steel costs, promotions and shipping, so verify with each seller. Treat any listing far below its class with suspicion, and ask what was cut. Usually it’s steel thickness, hardware quality or safety hardware.
The whole-system bill
If you’re still building the system, our how to build a home gym plan and our guide to weight plates help you sequence the rest. For deliberate drops, bumper plates are the specialized choice.
Warranty, shipping and support
Frame warranties commonly range from one year to “lifetime” on the welds and steel, with shorter terms on hardware and finish. Read the fine print. Ask who pays freight on replacement parts, whether the seller stocks J-cups and pins, and how long support takes to answer. A rack that arrives with a missing bolt isn’t a problem if the seller ships it quickly. It’s a big problem if you wait three weeks.
Also factor in delivery fees, liftgate service, assembly help and any anchors or platform materials you buy locally. A free-shipping banner usually moves the cost into the price rather than removing it.
Buying used: what to check before you pay
Used racks can save real money, and a solid steel frame doesn’t wear out the way a motor does. They also arrive with unknowns, so go in with a checklist and a willingness to walk away. This section applies equally to the best power racks you find at a gym liquidation and to a listing from a neighbor.
Inspect the steel and the holes
Run a finger around every hole. Elongated or burred holes mean a bar has hammered the J-cups for years. Look for dents in the uprights, cracks near welds, rust that has pitted the steel and bends in crossmembers. Surface rust on a bolt is normal. Deep pitting on a load-bearing tube isn’t. Bring a small level and a tape measure, and check that the rack stands square.
Check the small parts
- Safeties: bent pins, cracked sleeves or frayed webbing mean replace, not reuse.
- J-cups: liners should be intact and the lips undamaged.
- Hardware: all bolts present, with no stripped threads.
- Pull-up bar: no wobble, no cracks around the mounting points.
- Recall status: search the CPSC exercise equipment list using the maker’s name and the product name.
Pricing and logistics
A used rack should cost meaningfully less than a comparable new one, and the discount should reflect missing accessories and wear. Ask who disassembles it, because a rack that’s still standing in a garage can take hours to take apart. Take photos of how it went together, bag and label the hardware, and plan the transport. A big truck, two people and straps beat a hopeful hatchback every time.
When to walk away
Walk if the seller can’t say what it is, if parts are missing and not replaceable, or if any structural member has a bend or crack. A bargain with a hidden flaw becomes an expensive paperweight. Buying new from a seller with a return policy avoids the whole problem.
Questions to ask a seller before you buy
Whether the seller is a big retailer or a small maker, a handful of questions separates the confident from the vague. Ask the same questions of every seller of the best power racks, by email or chat, and keep the answers. If the reply is slow or evasive, that is a preview of future support.
About the rack itself
- What are the upright tube size and wall gauge, and are they the same on every post?
- What hole diameter and spacing does it use, and which accessories fit it?
- What are the separate capacity ratings for J-cups, safeties and the pull-up bar?
- Does the rack include numbering, and what finish covers the inside of the holes?
About support and logistics
- How is it shipped, what does delivery include, and what happens if a box arrives damaged?
- Who covers return shipping if it doesn’t fit, and is there a restocking fee?
- How quickly do you ship replacement parts, and do you charge for them during the warranty?
- Will you still sell compatible accessories in three years?
Good sellers answer plainly. If you hear “it’s industry standard” or “just trust us” instead of a number, take the hint and keep looking.
Decoding listings for the best power racks
Product pages for the best power racks are written to sell, not to inform. That doesn’t make them dishonest. It does mean you read them like a mechanic reads a used-car ad: ignore the adjectives, find the numbers and notice which are missing.
Ten numbers to check on any of the best power racks
- Upright tube size and wall gauge, stated together.
- Overall height, depth and width, plus the interior width between uprights.
- Hole diameter, hole spacing and whether the numbers are marked.
- Rated capacity for the J-cups, the safeties and the pull-up bar, stated separately.
- Shipping weight of the rack, which is a rough proxy for steel.
- Footprint including any rear stabilizer or base crossmembers.
- Hardware size and whether replacement bolts are sold.
- Finish type and whether it covers the hole interiors.
- Accessory compatibility, with a list of what bolts on.
- Warranty length by component and who pays for replacement shipping.
If a listing hides three or more of those, treat it as incomplete. A good seller publishes dimensions, gauge and capacities because they want you to compare. For a tiny cheat sheet, here is what typical home-rack values look like. Use it to spot outliers, not to replace the spec sheet.
| Spec | Commonly seen | Why it matters |
|---|---|---|
| Upright tube | 2×2, 2×3, 3×3 in | Rigidity and attachment range |
| Wall gauge | 14 to 11 gauge, some 7 | Flex, dents, long-term wear |
| Hole size | 5/8 in or 1 in | Accessory compatibility |
| Hole spacing | 2 in, or 1 in in a bench zone | Bar height precision |
| Height | About 70 to 92 in | Ceiling fit and pull-up room |
| Interior width | Roughly 40 to 50 in | Bench fit and bar sleeve clearance |
Claims to discount when shopping for the best power racks
“Commercial grade” has no standard definition for home racks. “Heavy duty” is a mood. A capacity such as “1,500 lb” tells you little unless you know what carries it. “Fits all attachments” usually means “fits ours.” Awards and star ratings can help. But weigh reviews for patterns rather than scores. Repeated mentions of wobble, hole misalignment or missing hardware are worth more than ten five-star notes about the color.
A rack with no stated gauge, no stated capacity, no dimension drawings and no warranty details is asking you to trust it blind. Look for a different seller. Also be careful with listings that show attachments or accessories the base price does not include.
Reading reviews without trusting them blindly
Skim for specifics. A review that says “the holes lined up and the safeties held a dropped bar” is more useful than “great rack!” So favor reviews that mention the lifter’s height and ceiling, and discount anything that reads like marketing. If you find recurring comments about customer service, shipping damage or replaced parts, assume the next buyer’s experience may match.
Eight archetypes: matching the best power racks to real lifters
We don’t name brands or models, because we haven’t hands-tested them and specs shift quickly. What we can offer is a set of archetypes, each described by the criteria that earn it a place. Think of them as shopping profiles. If you read one and feel recognized, use its list of specs to filter listings.
The compact 2×2 half rack
Suits a spare room, a modest ceiling and a lifter who handles moderate loads. Look for adjustable safeties, a wide base and real J-cups. Watch for thin walls and bolted joints that creak. It’s a smart starter if you’re honest about the loads you’ll lift in the first few years.
The 2×3 midweight cage
The all-rounder for garages and basements. Expect 11- or 12-gauge walls, a pull-up bar, laser numbering and a decent accessory catalog. Check the interior width and the ceiling before you fall for it.
The 3×3 heavy cage
For lifters who plan to train for a decade. Look for 11-gauge walls, 1 or 5/8 inch holes with a solid accessory line, a stable base and strong safeties. It costs more and weighs more, but resale is often better and wobble complaints are rarer.
The pressing-focused cage
If bench press drives your week, prioritize Westside spacing, strong spotter arms and enough interior width for a bench to slide in. Squat and pull-up features matter less here, so don’t overpay for them.
The wall-mounted folding rack
For shared garages and multi-use rooms. Look for a hinge mechanism that locks securely, a wall plate that matches your studs or concrete, and a depth that suits your lifts. A professional install is cheap insurance.
The low-ceiling rack
Built for basements and rooms with seven-foot ceilings. Heights around 70 to 72 inches work, with a pull-up bar placed carefully or omitted. Skip overhead presses inside the rack. Press from the safeties or outside the cage.
The rack-and-tower combo
Combines barbell work with a lat and low-row station in one footprint. Great if you want everything in one frame. Check cable smoothness, pulley quality and the extra depth and height before you commit.
The platform-ready cage
For lifters who drop bumper plates. Look for a bolt-down base, compatibility with a platform, strong safeties rated for repeated impact and a layout that leaves the lifting area clear. Pair it with the right plates and flooring.
How to choose among the best power racks
Start with the room, because a ceiling or doorway can eliminate half the best power racks on your list in a minute. Then match your training. Pressers lean on archetype 4, deadlift-and-squat lifters on 2 or 3, and those short on space on 1, 5 or 6. If you can’t decide between two, pick the one with the wider footprint and the heavier steel. A little extra stability costs you less than a regret.
The comparison page on Smith machine vs power rack may help if you’re also considering a guided bar, and the broader functional trainer guide is the place to look if cables are your priority.
Delivery, assembly, first-week checks and upkeep
The rack that arrives in nine boxes on a pallet feels very different from the one in the photo. A little preparation turns assembly from a frustrating weekend into a solid afternoon, and a few first-week habits catch the problems that matter before they bite.
Delivery day
Freight carriers typically deliver to the curb or the garage door and don’t carry boxes inside unless you’ve bought extra service. Have a helper, a hand truck and a clear path. Open the boxes on a flat surface and check every part against the packing list before you touch a wrench. Photograph any damage right away, because freight claims have windows. Keep the packaging until you’ve confirmed the rack is complete and rock steady.
Assembly, step by step
- Lay out the partsGroup the uprights, crossmembers, base pieces and hardware. Sort bolts by length so you don’t have to guess later.
- Build the base firstA square base sets the tone for the whole rack. Snug the bolts, don’t torque them yet, and check that diagonals match.
- Stand the uprightsUse a helper, because tall posts like to tip. Attach the top crossmembers while the structure is still loose.
- Square everythingMeasure the diagonals, level the rack on the floor and shim the base if the floor isn’t flat.
- Torque it allTighten every bolt in a consistent pattern, then add the safeties, J-cups and pull-up bar.
- Anchor or weigh it downBolt it to a slab if the manual allows. Otherwise, add a platform or ballast plates.
The floor under it: platforms, mats and stability
What sits under the rack affects how the rack behaves. A bare concrete slab is stable but hard on dropped bars and floor finishes. Thick rubber mats protect the slab and quiet the room, but soft mats under a loaded rack can let the base rock slightly. That’s why many lifters build a plywood platform with rubber on top, and bolt the rack to the plywood so the feet can’t shift.
If you do build a platform, measure its thickness before you pick a rack height, because a two-inch platform eats two inches of ceiling. Keep the platform edges flush and the surface level. Our home gym flooring guide details thicknesses, materials and subfloor protection, and it pairs well with any shortlist of the best power racks.
The first-week checklist
- Retighten every bolt after the first three sessions. Racks settle as steel seats and coatings compress.
- Check that both sides of every J-cup and safety sit at matching hole numbers.
- Test the safeties with an empty bar and then with a moderate load, as described in the safety section.
- Walk around the rack and listen: creaks usually mean a loose bolt or a bar rubbing the upright.
- Note any paint chips on contact points and touch them up to slow rust.
Upkeep that actually matters
Racks are low-maintenance, but not no-maintenance. Wipe sweat and chalk off the steel, because salt accelerates rust. Keep humidity under control in garages and basements. Inspect strap safeties for fraying, check J-cup liners for wear and replace damaged pins. A few times a year, go around with a wrench and retighten what has loosened. Our strength equipment maintenance guide covers bolts, cables, upholstery and rust prevention for the rest of your gear as well.
How racks fail: five problems owners commonly report
Even the best power racks rarely snap. They wear, loosen, misalign or annoy. Knowing the usual failure modes helps you choose a rack that avoids them, and helps you spot trouble early on the one you own. The patterns below are the ones that come up in ownership discussions again and again, without any hard statistics behind them.
Wobble that never settles, even on the best power racks
Some racks creak and shift even after you retighten every bolt. Usually the cause is thin steel, a narrow base or poorly squared assembly. The fix is anchoring, a platform or extra mass, but a rack that needs all three to feel okay was probably the wrong purchase. The best power racks calm down after the first retorque.
Misaligned holes and sloppy pins
If holes don’t line up, bolts bind and pins rattle. That points to loose manufacturing tolerances. A few thousandths of play is normal, but a pin that wobbles or a bolt you have to hammer is a warning. Ask the seller how they handle misaligned parts before you buy, not after.
Chipped finish and rust
Bars scrape paint wherever they touch the uprights, and chalk and sweat trap moisture. Powder coat helps, but nothing is immune. Touch up chips and wipe the steel down, and rust stays cosmetic. In damp basements and garages, you need to stay on it, or surface rust can creep into holes and pins.
Safeties that dent, fray or slip
Pin-and-pipe safeties can dent and mushroom at the ends after repeated drops. Straps fray at the edges and stitching. Spotter arms can bend if they were rated for catching, not dropping. Inspect them regularly and replace anything suspect, because the safeties are the one part you can’t afford to have fail.
Missing parts and slow support
The most common complaint isn’t the rack at all. It’s the three-week wait for a missing bolt or a replacement J-cup. Good support is part of the price of the best power racks. Before you buy, search for recent owner comments about response time, and keep your order number and photos in one folder.
Eleven mistakes and six myths
Most regrets about the best power racks repeat. Some come from impatience, some from clever marketing and a few from plain optimism. Here are the common ones, grouped by when they happen, followed by the myths that keep circulating.
Planning mistakes
- Measuring only the footprint. The bar, plates and walking room matter more than the base.
- Ignoring the ceiling. A tall cage and a low basement make for an awkward weekend.
- Forgetting the delivery path. The rack can’t stand if it can’t enter.
- Buying before choosing a bar. Standard bars don’t suit most power racks, so check the bar first.
Buying mistakes
- Paying for accessories you won’t use. Pegs, towers and fancy numbers cost money and space.
- Trusting a capacity number. Ask what it rates and who tested it.
- Choosing the lightest steel to save a little. A thin rack often costs more once you replace it.
- Skipping safeties. The best power racks always include or support real ones.
Using mistakes
- Setting safeties too high or too low. Both defeat the purpose.
- Racking unevenly. One hole of difference can tilt the bar.
- Never retightening bolts. Settling is normal, ignoring it is not.
Myths about rack strength and size
A thicker rack is always safer
Steel helps, but safeties, width and setup matter just as much. A heavy rack with badly placed safeties is still risky.
You need a 3×3 rack to lift heavy
Not necessarily. A well-built 2×3 can handle a lot, and many lifters never outgrow it. Match tube size to your goals.
A squat stand is as good as a cage
Only if it has proper safeties and a stable base. Many don’t, and that’s the gap that matters.
Myths about buying and using
Bolting to the floor is optional for all racks
For many freestanding racks, it isn’t. Check the manual. Some rely on anchoring for their rated stability.
The most expensive rack is the best power rack
Price tracks steel and brand. The right rack is the one that fits your room, your goals and your ceiling.
Reviews tell you everything
Reviews help, but they can’t judge your ceiling, your floor or your training. Use them for patterns, not verdicts.
A decision framework and four hypothetical walkthroughs
After all those specs, a decision path helps. Work through the questions in order, and stop at the first one that fits. They sort most shoppers toward one of the best power racks in about two minutes, which leaves the details for the spec sheet.
Walkthrough A: the long-haul garage lifter (hypothetical)
Priya is 5’4″, trains four days a week, has a garage with a nine-foot ceiling and plans to lift for the next decade. She squats, benches and pulls, and she wants room to grow into a landmine and a lat tower. Her profile points to archetype 3, a 3×3 11-gauge cage, or archetype 2 if the budget is tight. She should check hole size against the accessories she wants, anchor the rack to the slab and put plate pegs low for ballast.
Walkthrough B: the basement with a low ceiling (hypothetical)
Marcus is 6’1″ and has a basement ceiling of about 7’2″. A tall cage would crowd him, and overhead pressing inside it is out. He should look at archetype 6, a short rack around 70 to 72 inches, and do his presses from the safeties or just outside the cage. Moisture matters as well, so he’ll want a dehumidifier and a wipe-down habit. His next read is our basement home gym guide.
Walkthrough C: two people, one garage (hypothetical)
Dana and Chris share a two-car garage, and one bay still has to hold a car. They need a rack that folds flat, so archetype 5 is the match. They should confirm the wall type and stud spacing, hire help for the install and decide which side the plates will live on. Two lifters of different heights also mean a rack with clear hole numbers, which makes switching quick. Our guide on a home gym for two people covers duplicate purchases and waiting time.
Walkthrough D: the second-floor spare room (hypothetical)
Sam lives in an apartment upstairs and wants to squat. A full cage is heavy, and dropped weight travels as noise. Sam is better off with a compact half rack and a wooden platform with rubber on top. Sam should skip deliberate bar drops and check floor load with the landlord or an engineer. If the building says no, a different plan, like dumbbells and a bench, is better than a rack that causes problems.
Sam should start with the apartment home gym guide and the page on home gyms for renters.
When a power rack is not the right buy
There’s no shame in skipping the best power racks and buying something smaller. Some situations genuinely make something smaller or different the smarter choice, and a good guide should say so.
Your space can’t carry it safely
If you can’t give the rack two feet of clearance on each side, it becomes a headache. The same goes for a floor above a bedroom that would carry the vibration. In those cases, adjustable dumbbells and a bench give you a lot of training without the footprint. Our guide to a minimalist home gym shows how far that approach goes.
Your goals don’t need a barbell
Barbells are one tool. If your training leans on bodyweight, kettlebells or cardio, a rack adds cost and clutter. The small home gym ideas page has layouts that skip it entirely. A gym membership can also beat a rack when you want heavy training and have no room to store it.
You aren’t ready to commit
If you haven’t trained consistently yet, wait. Rent time at a local gym or train with dumbbells for a couple of months. The best power racks will still be there, and by then you’ll know what you actually lift. If your plan is still taking shape, our guide to what to buy first for strength training is the right place to return.
Your pre-checkout checklist for the best power racks
Before you click buy on any of the best power racks on your list, run through these. If any answer is “I’m not sure,” pause and fix it first. Most of these take two minutes.
- I measured ceiling height, doorway widths, stair turns and the path from truck to room.
- I know my lockout height for overhead pressing and my hang height for pull-ups.
- I know the rack’s tube size, wall gauge, interior width and total footprint.
- I checked the hole size against two accessories I might add.
- I confirmed capacity ratings for J-cups and safeties separately.
- I planned where the bar, plates and bench will sit, with loading room on both sides.
- I decided how I’ll stabilize the rack: anchors, platform or ballast plates.
- I searched the CPSC recall list and read recent reviews for repeated problems.
- I read the return policy and warranty, including who pays for shipping parts.
- I have a bar, collars and a bench that fit, or a plan to buy them.
If you can only fix three items, make them the ceiling measurement, the safeties and the stability plan. Those three decide whether the rack is used for years or returned in a week.
Best power racks: frequently asked questions
What makes the best power racks different from cheap ones?
Mostly steel, stability and safeties. The best power racks use thicker walls (commonly 11 gauge), larger tubes (2×3 or 3×3), a wide base, aligned holes and strong, adjustable safeties. Cheap racks cut on all of those, so they flex, creak and sometimes hide weak safety hardware. Price also reflects shipping weight and accessory support. Always compare spec sheets rather than photos, and verify capacity ratings by component.
Is a 2×3 power rack strong enough for home use?
For most home lifters, yes. A well-built 2×3 rack with 11- or 12-gauge walls handles a lot of weight, and plenty of people never outgrow it. A 3×3 adds rigidity and accessory options, which matters if you lift very heavy or want a rack that lasts a decade or more. Check the capacity of the J-cups and safeties, not only the frame.
How high should my ceiling be for a power rack?
Rack heights run from roughly 70 to 92 inches, but you need room above the rack for overhead pressing and pull-ups. Many people find eight feet workable with a standard rack, while seven feet usually calls for a short rack and no overhead presses inside it. Measure yourself with arms overhead, and see our ceiling height page for the details.
Do I need to bolt a power rack to the floor?
Not always, but it often helps. Many freestanding cages are stable with enough base footprint and low-mounted plate storage, yet bolting down removes the last bit of wobble and walking. Always follow the rack manual, and never drill into a slab without checking for hidden cables or heating lines. If you can’t anchor, a platform and extra ballast are good alternatives.
What is the difference between a power rack and a squat rack?
A power rack, or cage, has four posts and crossmembers that surround you, with safeties spanning the interior. A squat rack usually means two uprights or a half rack, with less enclosure and often less protection. Both can be safe if the safeties are real and the base is stable, but a cage gives the most coverage for solo training. See our detailed comparison for more.
Are Westside hole spacing racks worth the extra cost?
If you bench press often, yes. One-inch holes in the bench zone let you set the bar at the exact height you need. If you mostly squat and pull, two-inch spacing is enough, and you can save the money for plates or flooring. Many of the best power racks offer both versions, so match the choice to your main lifts.
How much should I budget for a power rack?
Roughly, entry racks cost a few hundred dollars. Midweight cages run several hundred to around a thousand. Heavy 3×3 or combo racks frequently cost one to a few thousand in the US market in late 2026. Add a barbell, plates, a bench, flooring and shipping, which together often match the rack’s price. Verify current prices and freight with each seller, because they change often.
Can I use a power rack in an apartment?
Sometimes. A compact half rack on a platform can work on a ground floor, but upper floors raise floor-load and noise questions, and many leases restrict heavy equipment. Ask your landlord, avoid dropping bars, use dense rubber and consider quieter alternatives such as dumbbells. Our apartment and renter guides go into the details before you buy.
How often should I check my rack for problems?
Give it a quick look before each session and a thorough check every month or two. Retighten bolts after the first few sessions, inspect strap safeties and J-cup liners, wipe off sweat and chalk, and touch up chips. Also search the CPSC recall list when you buy, and again if you hear news about your model or brand.
Conclusion: choosing the best power racks
The best power racks share a short list of traits. They have steel that doesn’t flex and a base that doesn’t rock. Their safeties earn your trust, their hole spacing fits your lifts and their size fits your room. Most of the rest is decoration. If you buy for the room you have, the lifts you do and the years you’ll train, you can’t go far wrong.
Here is your next step. Measure the ceiling, the doorway and the floor. Pick the archetype that matches your week. Then compare three listings by the numbers in the listing section, and read the manual before you hit buy. For the full strength setup, start with our guide to what to buy first. When you’re ready to plan the room, our home gym build plan picks up where this one stops.
Sources and further reading
- Physical Activity Guidelines for Americans (HHS) — federal guidance on muscle-strengthening activity and weekly activity amounts.
- CPSC: Exercise Equipment recalls — the public recall list to search before you buy.
- ACSM: Top Fitness Trends 2026 — general context on where interest in strength and home training is heading.
- Manufacturer manuals and spec sheets for any rack you consider. They are the final authority on capacity, anchoring, clearance and warranty terms.
Editorial note: this article is research-based guidance, not a product test, and it names no brands. Some links on this site may be affiliate links. If you buy through them we may earn a commission at no extra cost to you. Recommendations are based on the criteria in the article, not payout. Last reviewed October 2026. Specifications, prices, warranties and recalls change, so verify them with the seller and the CPSC before you buy.